Image Map
place holder
Showing posts with label Featured Post. Show all posts

Nov 17, 2014

A Homestead Christmas: Vanillekipferl

image source: lecker.de

I love Christmas and Yule-tide!  Few things have a warmer place in my childhood memories than celebrating the season with wonderful family traditions.  Traditions that included home-baked, made from scratch, cookies every year.  As there are limited weekends before the big event, and Advent starts on November 30th, I thought I'd get this year's festivities off to a start with some recipes - beginning with one of my favorites - Vanillekipferl.

Pronounced: Vah-Nil-Ay-Kip-Furl, these are delicate almond and vanilla flavored confections that are relatively easy to whip up but will have everyone thinking you've spent ages on them.  The only tricky part is their delicate nature after baking so take care when removing them from the baking sheet and when coating in vanilla sugar.

What you'll need:
2 cups all-purpose flour
1/3 cup white sugar
3/4 cups ground almonds (use a coffee grinder)
1 cup unsalted butter
1/2 of a vanilla bean

Directions:
Preheat oven to 325F (170C)
Mix dry ingredients
Cut in butter with a pastry blender (or fork) then quickly knead into a dough
Shape dough into logs 1/2" and cut off 2" pieces
Shape into crescent shapes and place on a parchment paper lined cookie sheet
Bake approx. 8 - 10 minutes or until just slightly golden (don't let them get too dark)
Cool 1 minute, then carefully roll in or dust with vanilla sugar.

To make vanilla sugar:
blend 1/2 vanilla bean with 1 cup sugar in a blender or small coffee grinder - make sure to pulse - then sieve.
The vanilla sugar will be like powdered sugar.

Steader's tip: I usually keep vanilla flavored sugar on hand year round. I make it by putting a couple of vanilla beans in a container of white cane sugar and allowing the sugar to become infused.  This infused sugar can then be ground/pulsed to create the powdery sugar called for above.  It's also excellent in everything from coffee to tea to cereal.

featured at From the Farm by Once Upon A Time In A Bed Of Wildflowers


this post may have been shared at one (or all) of these wonderful blog hops!

Oct 27, 2014

Let's Get Snackin' with Homemade Roasted Pumpkin Seeds


Both Mr. Newbie and I LOVE savory snacks and roasted seeds and nuts are right at the top of our list.  So with that in mind, I thought I'd share how we made our very own roasted pumpkin seeds. 

What you'll need:
A pumpkin (we used a pie pumpkin)
Serrated knife or hand saw
Ice Cream scoop or sturdy spoon
Bowl
Colander/Strainer
Baking sheet
Salt (we like sea salt)

Here's what we did:

Step 1
Cut the pumpkin in half using the serrated knife

Step 2
Scoop out the seeds (save the pumpkin meat to can or make pumpkin pie filling, soup or other yummy things)

Step 3
Put the seeds in the colander/strainer and rinse under cool running water until clean.

Step 4
Spread out on backing sheet and blot with paper towel or napkin

Step 5
Sprinkle seeds with a layer of salt

Step 6
Preheat the oven to 250F and place the seeds in the oven to bake/roast

Step 7
Roast until the seeds are dry and achieve the desired brownness

Step 8
Remove from the oven and place on paper towels to cool.  Salt to taste

There you have it, wonderful, tasty, scrumpdiddly-iscous roasted pumpkin seeds.  No worries about preservatives or other nasties and no hassles.

Featured on Strangers & Pilgrim's Link Up Love


this post may have been shared at one (or all) of these wonderful blog hops!

Oct 13, 2014

Pumpkins, Pumpkins Everywhere - Let's make pie!

Last week I shared how to can pumpkin with you and one of my favorite things to make with those canned chunks of pumpkin is pie.  Warm and spicy it just defines Fall and the holiday season for me, so I thought I'd share my pie recipe with you today.


Pie Making Essentials
  • Pie crust (you can use a store-bought crust but here's my homemade version if you'd like the full-on pie making experience)
  • Pumpkin Pie Filling
  • Pie dish (I like the deep dish type)
  • Mixer - electric or wand type - or potato masher and a spoon

For the pie crust you'll need:
  • 2 cups all-purpose flour, spooned and leveled (sifted)
  • 1 tsp salt
  • 2/3 cups butter or shortening
  • 5 - 7 tbsp cold water

Instructions:
  • Put flour into a mixing bowl
  • Cube or slice the butter/shortening into the flour
  • Using a fork or pastry cutter, cut the butter into the flour
  • Add salt and water
  • Mix until the dough is formed
  • Roll out on a flat, floured surface or between two sheets of waxed paper (should yield 2 - 9" pie crusts/shells

For the pie filling you'll need:

  • Pumpkin puree - use canned or steamed pumpkin cubes and puree with a hand mixer until smooth
  • 3/4 cup sugar
  • 1 tsp ground cinnamon
  • 1/2 tsp salt
  • 1/2 tsp ground ginger
  • 1/2 tsp ground cloves
  • 2 large eggs
  • 1 can evaporated milk (12 fl. oz.)
  • 1 UNBAKED 9-inch deep dish pie shell

Instructions:
  • Mix sugar, cinnamon, ginger and cloves in a small bowl.  Beat eggs in a large bowl.  Stir in pumpkin and sugar-spice mixture.  Gradually stir in the evaporated milk.
  • Place unbaked pie crust/shell into 9" deep dish pie pan
  • Pour mixture into pie crust/shell
  • Bake in preheated 425F oven for 15 minutes, reduce temperature to 350F and bake for 40 to 50 minutes or until a knife inserted near center comes out clean.  Cool on a wire rack for 2 hours.  Serve immediately or refrigerate.  Top with whipped cream before serving.


For decorative pie toppers:
using the second pie crust, cut out shapes using a small pie cutter or cookie cutter or use a knife to form free-hand pieces.  Bake at 375F in a preheated oven until desired brownness.  Remove from oven and cool completely.  Place on pie when removed from oven - prior to cooling.


featured by Trayer Wilderness at Simple Life Sunday;
A Gypsy Herbal's Warm & Cozy Fall Foods Roundup and
Strangers & Pilgrim's Link Up Love


this post may have been shared at one (or all) of these wonderful blog hops!

Oct 6, 2014

How to can pumpkin


It's officially Fall now and I'm super excited.  I love everything about Fall, the cool crisp mornings and mild evenings; the explosion of color from the changing trees and most of all the homey smell of baked goods and foods being prepared for storage.  If there's one food that epitomizes the season for me it's the pumpkin.  Pumpkin Pie, Pumpkin Spice Lattes, Pumpkin Soup and mashed pumpkin with butter, brown sugar and cinnamon (think mashed potatoes only yummier!).  With all that pumpkiny goodness awaiting it was next to impossible for me to not want to store some up for the winter.  So off I went on a fact-finding mission to figure out how to can those lovely little bundles of Autumnal joy...  here's what I found.  Canning pumpkin really isn't all that difficult, sure it will take a little more effort and you'll need a pressure canner but otherwise it's pretty straight forward.  Let's get this little disclaimer out of the way first. The USDA recommends you do not home-can pumpkin puree, butter or pie filling; only can pumpkin cubes.  So, now, let's get to it!

First, what you'll need:

A pumpkin (of course) but not just any ol' jack-o-lantern pumpkin... you'll need a Pie Pumpkin.  These are a smaller, sweeter and less grainy textured pumpkin which you can either get at your local grocer, farmer's market or if you're lucky to have one near "pumpkin patch".

You'll also need:
A microwave, steamer or a baking sheet and oven.  I use a steamer since I don't own a microwave and the oven just takes too long for me.  Choose what works best for you.

A knife for cubing the pumpkin and preferably a serrated knife for cutting it open before you cook it.
A clean pot holder or oven mitt for holding the pumpkin while hot
Canning jars, lids and rims (properly sterilized with new lids)
Canning tools like the jar grabber/lifter, funnel and and a spatula or wooden spoon handle
A pressure canner large enough to accommodate the canning jars you've chosen and a timer.

Now for the fun part....

Step 1 - Get your pumpkin

Step 2 - Prepare the pumpkin for cooking: wash the exterior in cool or warm water - do not use soap! Cut the pumpkin in half with the serrated knife (a smooth bladed knife is more likely to slip and injure you) using a sawing motion. If you prefer use a small hand saw to cut through the tough skin.

Step 3 - Scoop out the seeds - use a melon baller or ice cream scoop to scoop out the seeds and stringy insides. SAVE THE SEEDS for replanting or roasting!

Step 4 - Cook it!  There are several ways to cook the pumpkin.  As I mentioned above I prefer steaming, but I'll list the methods below so you can choose what works best for you.

Method 1: Microwave
Remove the stem and put the pumpkin into a microwavable bowl, cut it into more pieces if the larger ones won't fit but remember that the fewer (and larger) the pieces the easier it will be to remove the skin later.  Put a couple of inches of water into the bowl and cover it.  Microwave in intervals until the pumpkin is tender - but DO NOT MASH or PUREE it.  Be very careful to keep the pumpkin in tact.

Method 2: Steam on the stove top
I use a double pot steamer but you can also use an ordinary pot with a steamer basket.  Place the pumpkin pieces into the steamer and steam for 20 - 30 minutes or until tender.  Again, be careful not to mash the pumpkin.  Save the cooking liquid, you'll use it for packing the jars later.

Method 3:  Baking in the oven
This method takes the longest.  Place the pumpkin cut side down in a covered oven-safe dish. Bake at 350F (200C) for 45 - 90 minutes or until tender.  Test periodically with a fork.

Step 5 - Prepare your canner.  Fill the pressure canner with at least 3" of water and bring to a boil.


Step 6 - Peel the pumpkin - The skin should easily peel off using a blunt knife in one hand and an oven mitt in the other.


Step 7 - Cut it - Cut the pumpkin flesh into 1-inch cubes (BE CAREFUL NOT TO SMOOSH THEM).

Step 8 - Pack the jars - fill the canning jars with your pumpkin cubes and fill them with the cooking liquid from steaming (or if you used a different method - boil a pot of water and use that) leaving 1" of headspace.  Place the hot lids and rings on the jars.

Step 9 - Let's get canning... Take your jar lifter/grabber tongs and place the jars onto the rack of your pressure canner.  If the water level has dropped below 3" add more hot water.  Put the lid on the canner but do not place the weight or close the valve (depending on your type of canner).

Step 10 - Let it vent.  Put the stove top heat on high and let the canner vent steam for about 10 minutes.  This purges the airspace inside the canner.

Step 11 - Put the weight on or close the valve to let pressure build.  Pressure should build to 11 to 13 pounds in a dial-type canner gauge or 10 to 15 pounds in a weighted gauge canner.

Step 12 - Process.  Once you reach the correct pressure, start your timer and process the jars for the required time.  I used 65 minutes for pint jars and 75 minutes for quart jars.  Adjust the heat as necessary to maintain a consistent pressure in the canner.  Also pressure requirements depend on the altitude.  Here is a chart to help you determine the pressure and processing times if you are above sea level.  Canning books or other online canning guides may have more helpful charts so keep that in mind.


Step 13 - Be Cool - After you've processed the jars for the required time, turn off the heat and let the canner cool down.  After the pressure drops to zero wait 3 additional minutes and then remove the weights or open the valves to allow remaining steam to vent.

Step 14 - Remove the jars and let them cool. - using the lifter/grabber tongs, remove the jars and place them on a wooden cutting board or towel to cool.  Do not touch or bump them.  After the jars have cooled you should check the lids to make sure they have sealed properly.


That's it! Now you have yummy, homey pumpkin for the winter.  You can eat them as is, puree them for pie filling or soup or you can mash them up like potatoes. Have fun!

P.S.  Remember to label your jars! Here are some lovely printable labels from JES at Strangers & Pilgrims on Earth.


featured at Front Porch Friday by Preparedness Mama;
Strangers & Pilgrim's Link UP Love and
A Gypsy Herbal's Warm & Cozy Fall Foods Roundup


this post may have been shared at one (or all) of these wonderful blog hops!

Sep 1, 2014

Super Simple, Quick and Easy Homestead Apple Cobbler


This summer has been unusually mild over most of the U.S. and it's no different in our neck of the woods.  With the cool evenings and crisp mornings my mind has turned toward fall.  Its these blustery pooh-type days that put me in the mood for the gooey, warm comfort of apple cobbler so I thought I'd share our super simple, quick and easy Homestead Apple Cobbler recipe with you and spread the autumn love.

What you'll need
Filling:
Our canned apple pie filling (or a store bought filling if you choose)

Cobbler batter (printable card with our pumpkin cobbler recipe here):
1/4 cup butter - cubed
1 cup sugar
3/4 cup flour
1 tsp baking powder
1/2 cup milk
1/2 tsp salt

Instructions
Preheat the oven to 400F
Mix the dry ingredients
Work the butter into the flour mixture with a fork until crumbly
Incorporate the milk and beat until smooth
Pour or spoon batter into a deep baking dish (I like to use a 9" Pyrex(TM) deep-dish pie pan)
Pour or spoon the filling onto the batter (do not mix in) the batter will rise up through and around the filling.
Bake at 400 for 45 - 55 minutes or until golden brown and bubbly.  Start watching it after about 35 minutes as it can go from brown to burnt rather quickly.
Best served warm with vanilla ice cream or a vanilla sauce on top.

We hope you enjoy this little taste of autumn!


this post may have been shared at one (or all) of these wonderful blog hops!

featured by Strangers & Pilgrims

Aug 4, 2014

Come along and hear the song of granny's wild-grown scuppernong


O, I wish I was in the land of cotton
Old times there are not forgotten
Look away! Look away! Look away! Dixie Land.
 
The image of the south is quite fractured but the prevailing theme seems to be one of comfort, friendliness and homeliness coupled with a strong work ethic and a will to make do.  I'd say all of those things apply to my granny.  She's a born and bred southern woman who has that Midas touch.  She can make something out of nothing and figure out ways to use things that she finds around her home.  Nothing shows this more than her love for all things green and growing (besides Kudzu and poison ivy/oak).  She found some pretty little periwinkle blue ground-cover flowers in the back corner of her property and transplanted them to the front yard so she could see them while she sat on her front porch.  Instant beautification for free - just a little elbow grease required!  Another one of her transplants was her scuppernong vine. I can hear you now, scuppernong? What's a scuppernong? 

This fruit with the funny name is a staple for making jelly at granny's place and happens to be my all-time-favorite homemade jelly made by granny.

Scuppernongs are wild grapes (a type of muscadine), similar to green grapes in texture and taste but much, much plumper.  They can range in color from light green to bronze; the resulting jelly varies in color accordingly.  She found her vines growing wild many years ago and transplanted them to the side-yard next to her garden.  They are prolific producers every year and require very little effort on her part.  Beyond making sure they were trained to grow along the trellis (two posts about 8 feet apart with a sturdy wire running between them) and the occasional watering they do their own thing and reward her year-after-year with a bountiful harvest.  They are not very cold tolerant (thriving where temperatures rarely go below 10 F) so many northerners have never heard of them, but the southern folk know and they sure do make use of them.  Everything from jelly to wine is made from this lovely fruit. You can eat the fruit whole as well, there's some debate among southerners as to eating the skins but nothing says you can't and that's where most of the nutrients are. The seeds on the other-hand you'll either have to swallow or spit out. We children loved having spittin' contests with these, similar to watermelon seeds but not quite as hefty. ;-)  If granny ever made wine from them I don't recall it, I just know she makes some heavenly jelly. 

If you should be lucky enough to find yourself in the way of some scuppernongs (or scuppanons as nanny calls them) I'd encourage you to scoop them up and give granny's jelly a try.

Granny's Southern Scuppernong Jelly

Ingredients:
Several pounds (3-4) of scuppernongs (enough to yield about 5 cups of juice when done)
2 cups of water
2 tsp lemon juice (granny uses the bottled kind for convenience)
1 pack of fruit pectin (low sugar or no sugar work best)
6 1/2 cups of granulated sugar (this is not a diabetic-friendly recipe)

Tools:
large saucepan/boiler
potato masher or something similar to crush the fruit with
mason/canning jars - granny uses pint size jars
water bath canner or a large pot and canning rims to process the jars in

  1. wash and de-stem the scuppernongs
  2. place in a boiler with the 2 cups of water and bring to a rolling boil. As the fruit/water is heating crush the fruit with the potato masher to release the juices.  The more you crush the more juice will come out.  Once at a boil, reduce the heat and simmer covered for about 10 minutes.
  3. strain the mixture through a mesh sieve/strainer to remove the large solids.  You can then process through a food mill if you like but granny just strains hers through a cloth made from an old (well bleached) cotton sheet.
  4. reserve 5 cups of juice (if you don't have quite enough you can simply add some water or even white grape juice if you prefer)
  5. prepare your canner and jars.  If you don't have a water bath canner you could use a large stock pot as well, simply put some jar rims on the bottom of the pot before filling with water. You'll place your canning jars on top of the rims to keep them from sitting directly on the bottom of the pot.
  6. measure out your sugar and set aside
  7. in a large pot/boiler combine the juice, pectin and lemon juice and bring to a rolling boil - the sort you can't stir away.
  8. add the sugar in one dump and return to a full boil for 1 minute
  9. remove from heat and ladle into canning jars leaving 1/4" of headspace
  10. wipe the jar rims, add the lids and rings and process in the canner at a boil for 5 minutes (or adjust for altitude should you need to)

Voila, you've just made some scrump-diddly-iscious scuppernong jelly the southern granny way.

Granny makes hers with good ol' granulated sugar, I haven't tried it with a sugar substitute like Splenda but if you should, please let me know how it turns out.


this post may have been shared at one (or all) of these wonderful blog hops!


Strangers & Pilgrims Art of Homemaking Mondays and
Lil' Suburban Homestead's From the Farm Hop

Jul 28, 2014

Incredible No-Hassle, No-Knead Artisan Bread

We here at the Ten Acre Homestead LOVE freshly baked bread.  We've tried several different kinds over the years; bread machine variations, classic white bread loaves etc., etc.  Now we've discovered this incredible recipe for the easiest, no-hassle bread we've ever made.  It requires minimal ingredients and very little effort. 


Introducing: Incredible No-Hassle, No-Knead Artisan Bread

Here's what you need:

6 cups of all-purpose flour (or bread flour if you prefer)
1/2 tsp active dry yeast
2 1/2 tsp salt
2 - 2 2/3 cups water
6 - 8 quart dutch oven (slightly smaller will work too for a taller loaf)


Here's how you make it:

Step 1: gather your ingredients
Step 2: mix the dry ingredients together in a large bowl
Step 3: add the water, start with 2 cups and add as necessary to get a firm sticky, wet dough (tip: a dough whisk comes in really handy here but is not necessary. This is not an affiliate link, I just happen to really like mine)
Step 4: cover with cling wrap and let sit on the counter top for 12 - 18 hours (I know, I know this sounds like an insanely long time but the longer rise time makes for better flavor and allows you to use less yeast - plus you don't have any hassle or kneading to contend with)
Step 5: place a tea towel covered by a piece of parchment paper on the counter and dust well with flour.
Step 6: the dough will look foamy/spongy and will have darkened slightly. With well floured hands work the dough out of the bowl (you want it to still be somewhat sticky but not so wet that it's an unmanageable blob) and using your fingers and plenty of re-flouring of your hands, work it into a ball.
Step 7: place seam-side down on floured parchment/towel and dust with more flour
Step 8: gently fold the parchment and towel over the dough ball and leave to rise for 1 - 2 hours or until doubled in size.
Step 9: during the last 30 minutes of rise, place a cast iron dutch oven with the lid into the oven and preheat to 425F
Step 10: carefully remove the hot dutch oven to the stove top, unwrap the dough ball and plop it into the dutch oven by holding the parchment/towel underneath in one hand and carefully turning it over into the dutch oven.  (just a note of caution: the flour from the parchment/towel will most likely billow up and go everywhere so be careful when tipping this into the pot)
Step 11: cover with the lid and place in oven to bake for 40 - 45 minutes.  uncover and bake for another 15 minutes or until golden brown
Step 12: remove from oven and exert a lot of patience while you wait for this to cool down.  Resist the urge to cut into it at all costs as this cool-down period is imperative to achieving that crunchy, crispy crust!  Once it stops crackling (like rice crispie's) you should be OK to cut it. 


I usually stir up the dough in the evening after dinner and Mr. Newbie finishes it off in the morning.  If we don't devour it all right away it gets stored right in the dutch oven on the counter top and will lasts for several days just fine. 

And there you have it. Easy, peasy super yummy bread with a minimum of effort - all you need is a little time...  This would be wonderful with old fashioned homemade fig preserves.

Feel free to share any favorite recipes you might have or if you should try this I'd love to know how you like it.

this post may have been shared at one (or all) of these wonderful blog hops!

Featured at Preparedness Mama's Front Porch Friday #22 and
Timber Creek Farm's From The Farm Hop

Jul 14, 2014

How to make Granny's Old Fashioned Fig (or pear!) Preserves


A breakfast at my granny's place is just not complete without the homemade biscuits and preserves.  Not to mention the bacon, sausage eggs and whatever else she might decide to throw on the table.  As a child I didn't much care for preserves - something about the mushed up fruits just set me to crying -but I sure did love the "syrup" that came along with them.  I don't mind the fruit that much these days ;-)

Anyway, back to the preserves... since we're inching along through summer and since she always had these on hand from her very own pear and fig trees... I thought I'd share my granny's method of making her preserves.  So lets get down to it, shall we?

This is a very simple but wonderful recipe (or formula if you will):

You'll need:
  • 1 part sugar to 3 parts fruit (however much you have on hand)
  • canning jars in the size you like best - granny uses pint size ones cause that's what she has around from all her other canning, plus you just can't have too much of these yummy preserves at any given time.
  • a pot large enough to hold the fruit and sugar mixture
  • a lid for the pot
  • some lemon juice (optional) to hold the color
  • water (if needed)

Now, here's how the magic happens:

Wash & cut up the fruit, small figs get halved while larger ones get quartered.  Pears get pealed before being sliced and chunked (spellcheck tells me that's not a word but I'm going with it.)
Put those lovely figs (or pears!) into the pot with the sugar and cover with the lid.
Put them on the stove but don't turn it on.  Leave them to sit covered for 8 - 12 hours or overnight.  Then uncover and look at all that yummy fruity goodness!  Now you can add the lemon juice (or slices or squeezed halves) if you choose.
Turn the stove on and bring to a gentle rolling boil.  Simmer/boil this until the fruit has cooked down a little and become soft.  Add a little water if there isn't enough juice to keep things going while boiling.  Ladle the hot mixture into your canning jars leaving about 1/4" headspace and seal with new lids (you can reuse the rims and jars as long as you make sure to sterilize them properly. 
That's it, let them seal up on their own (you can flip them over on their heads for 15 minutes or so but don't have to) no need to waterbath can them.  You should hear them seal within 30 minutes or so, if for some reason one or two don't seal, you can put them in the fridge or freezer.  That's it!  Easy peasy right?

I hope you'll give these preserves a try - personally I love these over fresh, buttery biscuits but you could have them on toast, waffles or even pancakes or maybe even pair them with a bit of pork roast or prosciutto  if you like... experiment and see what you think.  :-)

Thanks for stopping by, I hope you'll let me know if you give them a go or even if you don't I'd love to hear your thoughts on preserves or any other little thing you might like to share.


this post has been shared at one (or all) of these wonderful blog hops!

http://trayerwilderness.com/simple-life-sunday-27/

Jun 2, 2014

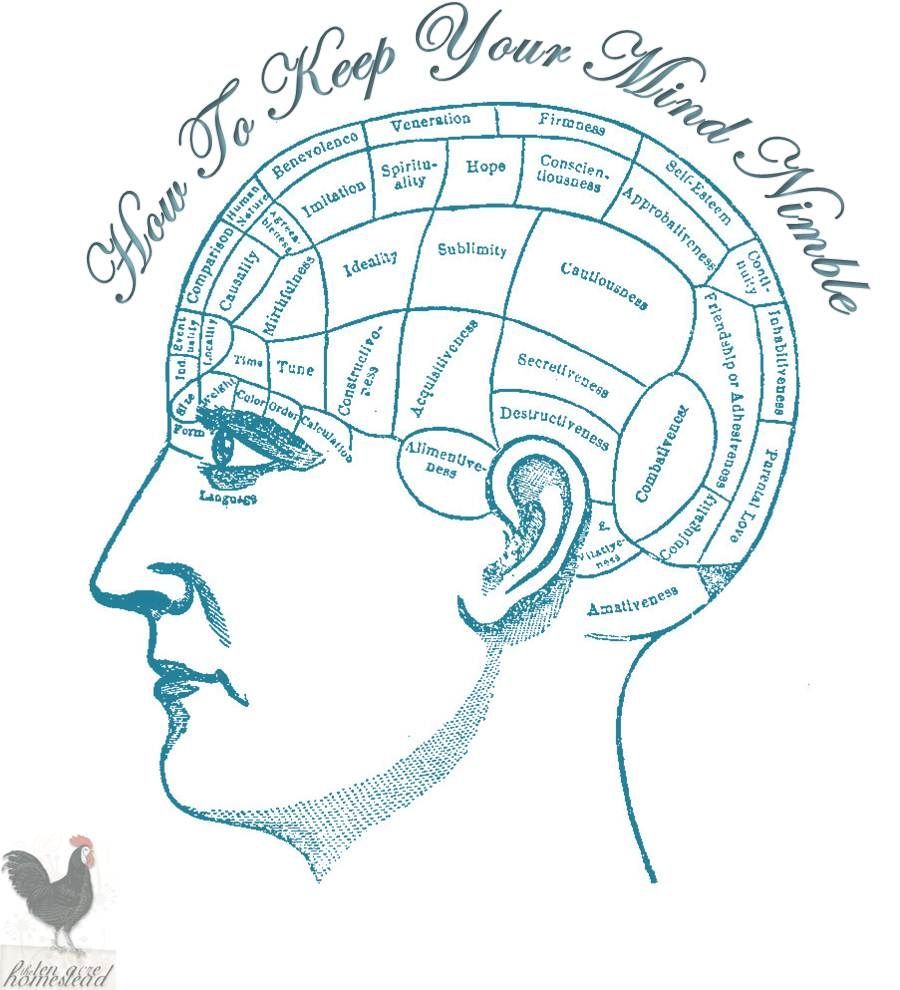
How to keep your mind nimble


In this health-conscious age the homesteading lifestyle is very attractive. What's not to like about organically grown vegetables and farm fresh, free-range eggs and chicken, right? We focus on taking in quality nutrition, getting the proper amount of exercise and trying to maintain a proper sleep cycle; but in all of this the one thing often overlooked is the mind. Alzheimer's, and other mental diseases are all too common among the elderly but there are ways to stave them off such as the previously mentioned healthy choices coupled with what my granny would call mental calisthenics.  I know a lady never tells her age, but my granny, who has passed her 8th decade and is going on her 9th, is still sharp as a tack.  Although her body has the usual age-related ailments her mind is still humming along, quick as ever.  She can run circles around most folks doing math in her head and her vocabulary is staggering.

So what's her secret?  Her mental fountain of youth?

In a word... crosswords. 

That's right, those little paperback crossword and word search booklets you can pick up in the magazine isle of any convenience store or big box store like Walmart. 

Her brands of choice are PennyPress & Dell
Being the frugal southern woman that she is, she won't pay retail prices for them either.  She does what people of her generation have always done, she takes pen and paper and writes to the publisher/company and asks them to send her their back issues.  Once every month or two she'll get a box full of them and those will keep her going for a little while.  It's a rare thing to see granny sitting still without a crossword booklet in hand.  She's even setup the side table by her recliner with a box full of pens and a stack of the booklets ready and waiting for her.


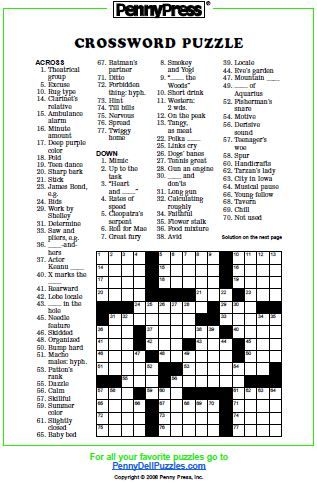
Just for fun, here is one of the PennyPress sample puzzles. Click on the image to go to their site for a printable version.
 
I hope that when I reach granny's age my mind still works half as well as hers.
 
How about you?  Do you have any mental exercises you like to do?  How do you keep your mind and body in shape?


this post has been shared at one (or all) of these wonderful blog hops!

http://trayerwilderness.com/simple-life-sunday-22/

May 26, 2014

The Homestead Kitchen: How To Can Apple Pie Filling (recipe included)


As American as Apple Pie, isn't that how the saying goes? Well, American or not it's hard not to like an apple pie... or cobbler...

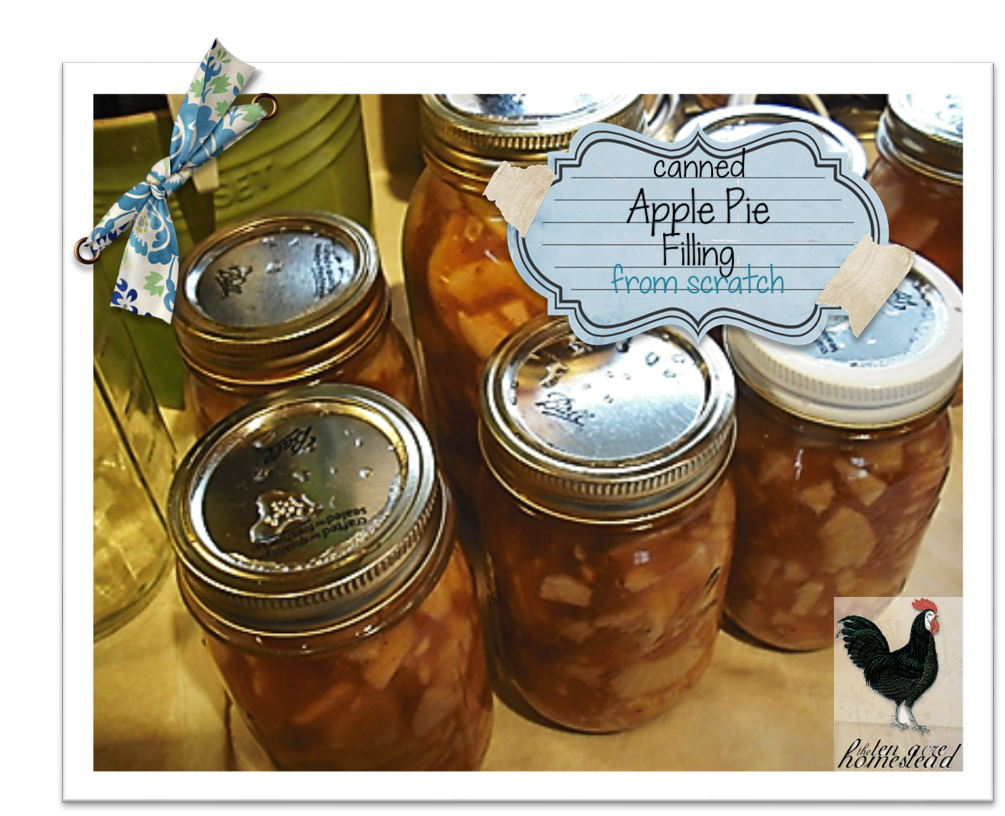
I just baked up an apple cobbler using some apple pie filling that I had canned a little while back using our "pick your own" apple haul from a local orchard and it turned out great.  More on that in a later post though, first I'm going to let you in on my pie filling recipe!  This filling is wonderful with a delightful caramel color and the rich smell of apples and spices mingling... yummy! 

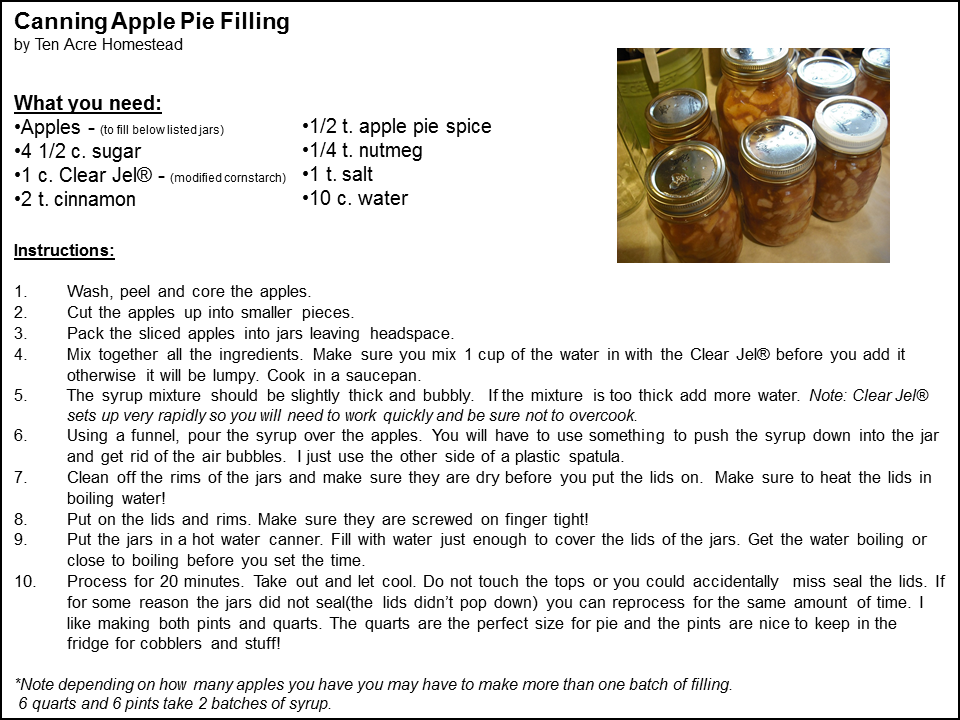
Homestead Apple Pie Filling for canning - click to enlarge or
get the printable recipe card here

ClearJel® (NOT instant ClearJel®) is a modified cornstarch that has been recommended by the USDA for foods which will be canned as they do not pose the risk that cornstarch does during the canning process.  It is not readily available, however you can purchase it inexpensively on Amazon and in a quantity (1 lb) that should last a very long time. I've read that some Walmart stores carry this in spring and summer so you may want to check with your local store.  ClearJel® thickens very quickly and very powerfully so it can be used sparingly.  Here's what the USDA has to say about ClearJel®:

"It can be used for canned fruit pie fillings because it does not break down in the acid food mixtures and does not thicken enough during heat processing to interfere with the intended effect of the heat on killing bacteria during canning. It is preferred for thickening canned pie fillings as well as other foods over other corn starches because it has less or no aftertaste, the thickened juices are smooth and clear, and foods thickened with ClearJel® may be frozen. There is no substitution for ClearJel® that can be made in these recipes. This means do not use other corn starch, flour, tapioca, or other thickener in our recipes. You also must use ClearJel® and not Instant ClearJel®, ClearJel A®, any other form of ClearJel®, or any other modified corn starch."
While many involved in canning find nothing wrong with using plain ol' cornstarch, I feel that it's better to be safe than sorry when dealing with things like botulism! Just a thought...

If you are afraid of canning, this filling can be used as is (however I must admit that I don't know how to scale it down from the 9 pints or 4.5 quarts/batch quantity shown above).  If you do want to use it straight away, you will need to figure out the scaled down quantity or make up the batch and freeze what you don't use by following steps 1 through 5.  If you do not plan to store/freeze this filling you can use regular cornstarch.

How about you?  Have you made and canned your own pie filling?  How did it turn out?

shared at: Backyard Farming Connection; HomeAcre Hop; Front Porch Friday; Farmgirl Friday

http://preparednessmama.com/front-porch-friday-13/

Apr 28, 2014

The Homestead Project: Braided Rag Rug


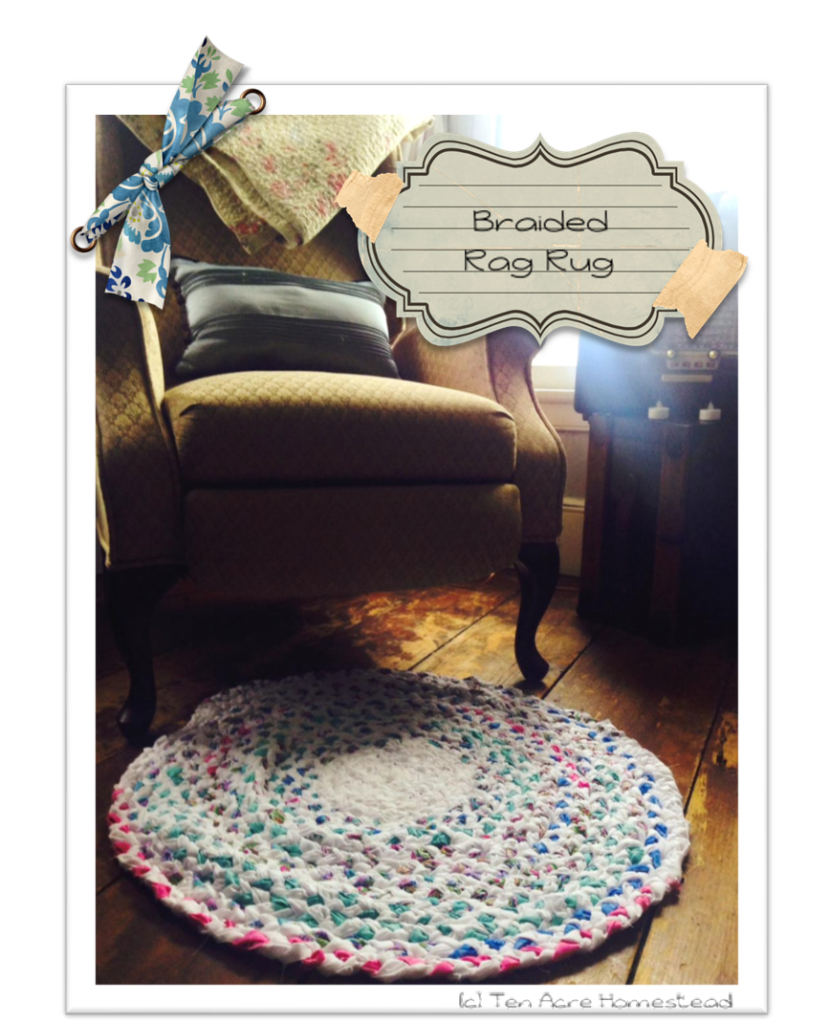
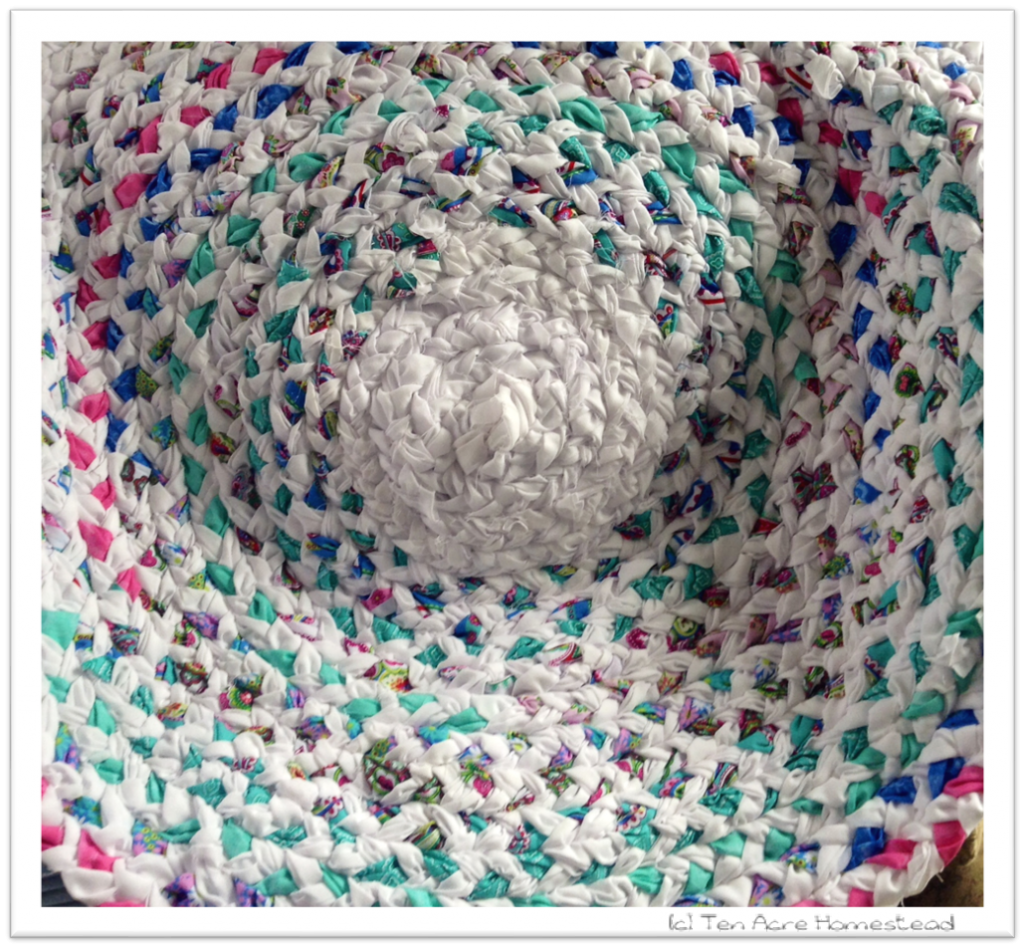
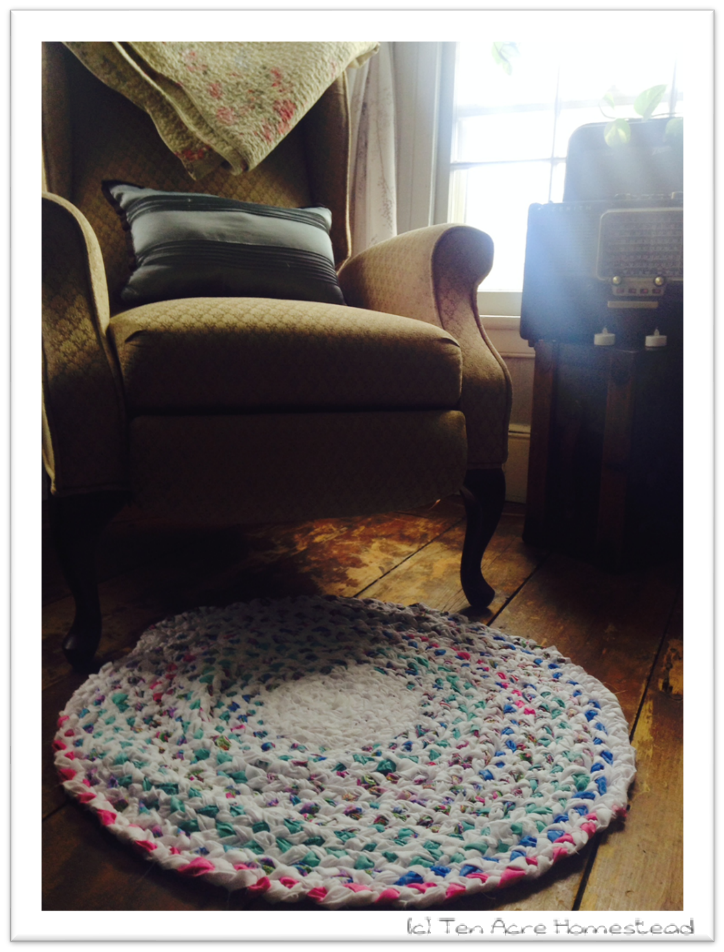
Braided Rag Rug


I finally finished my braided rag rug project this weekend.  I say finally, but really it was just my procrastination that made it take so long to complete.  This simple project came together quickly without any special tools or equipment.  I followed the tutorial by Moda Bake Shop here.
 
What you'll need:
1 honey bun of your choice
(I used a jelly roll instead since I couldn't find any honey buns in my local crafts supply shop)
4 yards of white fabric
Sewing needle
Cotton thread
Scissors
 
You'll start by cutting/ripping your white fabric into strips (width of fabric wise) to match the width of your honey bun or jelly roll fabric.  Once you have all of your strips of fabric you can begin.
 

preparing to join the strips
Begin by laying 1 white, 1 patterned (roll or bun) and 1 white strip next to each other.
Overlap the top ends and secure by stitching across then pin this in place using a safety pin so that it is secure when beginning your braid (see example in tutorial).  I secured mine to a pillow which I could keep on my lap and keep flipping to wind the braid as it progressed.  The tutorial shows the exact manner to connect the next strip to the end of the braiding strips.  Basically you will fold over the bottom end of the braiding strip, then you will make a small snip with scissors perpendicular to the fold.  Do the same to the top end of the next strip to be attached. 

Next you will line up the slits over each other with the new strip being on the top surface.  Take hold of the tail end/bottom of the new strip to be joined and bring the end up to the back of the previous strip of fabric.  Pull the end of the new strip through both slits and out the front.  Holding onto both strips by the slits continue to pull until you have the new strip almost completely through, then release the slits and gently pull until you have a small know (like that of a men's tie) joining both strips together. Continue in this manner until all strips have been braided.  IMPORTANT: Make sure to braid loosely.  If you braid tightly it will cause your rug to pucker and roll up when you begin sewing it together.
 

Once you have completed braiding all of your strips into one continuous braid, secure the end by stitching across it as you did at the beginning. (You can do this with a machine but it doesn't take very long by hand).
 
Here comes the exciting part: you're ready to start sewing it into a rug.  This is where I finally felt that the rug was beginning to take shape.
  
Take one end of the braid and begin by scrolling it into a flat cinnamon bun style roll.  Thread your needle and get to stitching!
 
I used a simple loop stitch through each side of the braid as I worked and it practically disappeared without a noticeable seam. Again there are really great pictures of this step in the tutorial.  Just follow its simple directions and you shouldn't have any trouble at all.
 
And here it is, the finished product!  What do you think?  Have you made one of these rugs before?  If so, I'd love to hear about your experience.
 

This post was shared at the following "hops":  Homestead Barn Hop, The HomeAcre Hop; Deborah Jean's May Sewing Party
Hop on over and join the fun!
 
http://www.oakhillhomestead.com/2014/05/homeacre-hop-69-and-day-4-of-my-blog.html