Image Map
place holder

Jan 5, 2015

Homesteading & Technology: 5 free apps for today's homesteader


First off, let me wish you all a very happy New Year, filled with all things bright and beautiful!
Welcome back from the holiday festivities and into a new year of homesteading activities.

Now, let's get on with the homesteading show (so to speak)...

Today's homesteader has a world of resources at their fingertips: blogs, digital libraries, print libraries, county extension offices, aunt Gertrude and many more.  If you're semi-techie (like me) you probably have a smartphone or a tablet lying around, so now you can keep a pocket resource in the form of apps as well.  I personally like the iPad so the following list of apps is iOS based (sorry android users but I hope you can find them in your app store too).

So here we go, the 5 FREE apps I've found useful in our homesteading venture are:


1.  Flipboard - This app is like a personal magazine/newspaper.  You can customize it to follow a broad range of topics and interests - including homesteading!  It's visually appealing, easy to setup and very pleasant to read.


2. Vegetable Garden Calculator - A very handy little app for helping calculate how many plants you will need to feed a given number of people.  Old pros may not find this one quite as thrilling but for newbies like me this is a great little tool to have.


3.  GardenMinder - Nifty app for helping to plan raised-bed gardens.  It will allow you to layout the garden beds and keep a journal with notes and pictures of each garden right in the app.  It also features automatic weekly reminders that are based on the frost dates for your area and the specific crops you are growing.


4.  Grow Your Own Organic Herbs - easy to use quick-reference tool that provides tips and advice for growing organic herbs.


5.  Newsify - This is similar to Flipboard but also works as an RSS reader allowing you to keep up with all of your favourite homesteading bloggers from around the country and the world.  Laid out in a lovely, easy to read format - imagine all that homesteading goodness right there at your fingertips.


So there you have it, my choices for 5 free homesteading apps!  I hope you find these useful and if you have some other apps that you use often in your homesteading endeavors feel free to let us know in the comments area!


this post may have been shared at one (or all) of these wonderful blog hops!

Dec 23, 2014

Homestead Christmas Greetings

 
Silent Night
by Newbie Steader
 
A hush descends
No sigh is heard -
Upon the hill
The crimson bird
 
Is tucked within
His feathered bed
While moonbeam flakes
Fall round his head.
 
And down below
The forest glade
In sylvan gleam
To sleep is swayed.
 
Far off the homes
With amber glow
Are bathing gold
The winter's snow
 
And snug within
Their timbered walls
The children dream
Of reindeer calls.
 
So then the Yule
Has come and gone
With splendid hopes
For all and one.
 
Merry Christmas to you all!


this post may have been shared at one (or all) of these wonderful blog hops!

Dec 15, 2014

Homestead Christmas: Gluhwein: traditional & non-alcoholic

image source: duden.de

Another fond memory I have of our yule-tide traditions is Christkindlemarkt or the traditional Christmas markets found over much of Germanic Europe.  There's nothing quite like it for putting a smile on one's face.  Wandering through the many booths, viewing the arts, crafts and local food favorites is one of the coziest memories I have of growing up.  A trip to the market just wouldn't be the same without a stop-off at the Glühwein stall to warm up, the smell of mulling spices in the air and the warm mug in your hand as you gaze out over the twinkling lights and merry sounds around you.  In the absence of the traditional markets in our neck of the woods, we still like to make this holiday favorite for ourselves.  For those among us that prefer a non-alcoholic version, I've got you covered!  So keep on reading and I hope you enjoy a warm, and festive Yule with all your family and friends.

Traditional Glühwein

  • 1 bottle of good quality red wine
  • 1 cup of water
  • juice of 1 lemon
  • 5 tbs sugar
  • 3 whole cloves
  • 1 cinnamon stick
  • 1 oranges - cut into bite size pieces
  • orange slices for decoration


  • How to make it: Put first 6 ingredients in a pot and bring it close to boil then reduce to simmer.
    Add cut orange to the wine.
    Let simmer.
    Remove clove, cinnamon stick and orange pieces before serving it into lightly pre-warmed glasses. Decorate glasses with an orange slice.


    Non-Alcoholic Glühwein also known as Kinderpunsch (Children's punch)
  • 2 – 3 whole Cloves
  • 2 crushed Nutmeg (or app. ½ tsp Ground)
  • 1 - 2 Cinnamon Sticks
  • Whole Lemon, unpeeled, quartered
  • Whole Orange or Tangerine, unpeeled, quartered
  • 1 gallon red grape juice (preferably unsweetened)

  • Pour the juice into a dutch oven or thick bottomed pot. Start warming it up on the stove.  Add the spices to the juice. Add the quartered lemon and orange/tangerine. Allow to soak or slightly simmer at least a half-hour, but not more than an hour. Remove the whole spices and lemon and orange/tangerine.

    Keep covered and on lowest heat.  Serve in prewarmed glasses or mugs and decorate as above.

    Enjoy!


    this post may have been shared at one (or all) of these wonderful blog hops!

    Dec 8, 2014

    A Homestead Christmas: Lebkuchen (German Gingerbread)

    With the coming of winter things have slowed down considerably on our front. We are comfortably preparing for the Yule-tide celebrations and looking forward to the homey, peaceful months ahead.

    As the second installment of some of my favorite childhood Christmas traditions I'd like to share another cookie recipe with you all. This one is a traditional German cake-like cookie similar to gingerbread, however, the taste is quite different. Lebkuchen (most closely pronounced "layb-coo-ken") has been a traditional staple in Germanic Europe since the late 1200s when specialty bakers and monks have been recorded as creating these honey-based cakes. Each town, and even family, has a special recipe that is passed down through the generations which varies as to the spices incorporated (Lebkuchen can range from spicey to sweet) and the favorite form of decoration. Some are quite large and hard so that they can be decorated with icing saying and hung from ribbons for various festive occasions. The following recipe is a moist cake-like cookie with a pleasingly spicy flavor and can be decorated in a number of ways: lemon glaze frosting, chocolate coating or simply plain with almonds and candied fruit. Whatever your preference these make a lovely addition to any cookie tray during the holidays.


    source: Cafe Schubert


    Yield: 18 cookies

    What you'll need:

    For the cookies:

    • 3 cups all-purpose flour (plus extra for kneading)
    • 1/2 tsp baking soda
    • 1 1/4 tsp ground nutmeg
    • 1 1/4 tsp ground cinnamon
    • 1/2 tsp ground cloves
    • 1/2 tsp ground allspice
    • 1 egg
    • 3/4 cup light brown sugar
    • 1/2 cup honey
    • 1/2 molasses

    For the Glaze:

    • 1 cup confectioner's sugar
    • 2 tbsp. water
    • 1 tbsp. lemon juice

    Optional:

    • Sliced Almonds or other nuts, candied fruit

    Directions:

    1. Sift together the flour, baking soda, nutmeg, cinnamon, cloves and allspice. Set aside.
    2. Beat the egg and sugar together on medium speed until light and fluffy, about 2 minutes. Scrape down the bowl.
    3. Beat in the honey and molasses until thoroughly combined.
    4. On low speed, stir in the flour mixture until just combined.
    5. Turn the dough out onto a well-floured surface. Knead the dough, adding more flour as needed until a stiff dough is formed.
    6. Wrap the dough in plastic wrap and chill until firm (about 2 hours or overnight).
    7. Preheat the oven to 350F. Grease 2 baking sheets or line with parchment paper
    8. On a well-floured surface, roll out the dough into 9x12-inch rectangles. Cut the dough into 18 3x2-inch rectangles (or with any cookie cutter shape you desire). Bake for 10-12 minutes.
    9. Transfer to a wire rack and let cool completely. Whisk together the confectioner's sugar, water and lemon juice for the glaze. Brush or spread on top of the cookies.
    10. Allow the glaze to firm before storing in an airtight container at room temperature.

    Steader's Note: These cookies taste better after a couple of days "rest" since the flavors develop over time.  Also, place the sliced almonds or other nuts and fruit on top of the cookies before baking. You can glaze over them if you choose after baking or leave them plain.  If the recipe is varied to make a drier cookie and a hole is made before baking, these can be iced/decorated and hung from the tree as ornaments.

    I hope you enjoy these and let me know how they turn out for you should you decide to give them a try.


    this post may have been shared at one (or all) of these wonderful blog hops!

    Nov 17, 2014

    A Homestead Christmas: Vanillekipferl

    image source: lecker.de

    I love Christmas and Yule-tide!  Few things have a warmer place in my childhood memories than celebrating the season with wonderful family traditions.  Traditions that included home-baked, made from scratch, cookies every year.  As there are limited weekends before the big event, and Advent starts on November 30th, I thought I'd get this year's festivities off to a start with some recipes - beginning with one of my favorites - Vanillekipferl.

    Pronounced: Vah-Nil-Ay-Kip-Furl, these are delicate almond and vanilla flavored confections that are relatively easy to whip up but will have everyone thinking you've spent ages on them.  The only tricky part is their delicate nature after baking so take care when removing them from the baking sheet and when coating in vanilla sugar.

    What you'll need:
    2 cups all-purpose flour
    1/3 cup white sugar
    3/4 cups ground almonds (use a coffee grinder)
    1 cup unsalted butter
    1/2 of a vanilla bean

    Directions:
    Preheat oven to 325F (170C)
    Mix dry ingredients
    Cut in butter with a pastry blender (or fork) then quickly knead into a dough
    Shape dough into logs 1/2" and cut off 2" pieces
    Shape into crescent shapes and place on a parchment paper lined cookie sheet
    Bake approx. 8 - 10 minutes or until just slightly golden (don't let them get too dark)
    Cool 1 minute, then carefully roll in or dust with vanilla sugar.

    To make vanilla sugar:
    blend 1/2 vanilla bean with 1 cup sugar in a blender or small coffee grinder - make sure to pulse - then sieve.
    The vanilla sugar will be like powdered sugar.

    Steader's tip: I usually keep vanilla flavored sugar on hand year round. I make it by putting a couple of vanilla beans in a container of white cane sugar and allowing the sugar to become infused.  This infused sugar can then be ground/pulsed to create the powdery sugar called for above.  It's also excellent in everything from coffee to tea to cereal.

    featured at From the Farm by Once Upon A Time In A Bed Of Wildflowers


    this post may have been shared at one (or all) of these wonderful blog hops!

    Nov 10, 2014

    Unintentional lessons in food preservation

    Mr. Newbie and I are very fond of hiking and camping in the late spring and autumn months and toward this end we decided several years ago to put up some dehydrated foods that we could take along with us on the trails.  We were able to enjoy the fruits of our labor (punn intended) and felt a great sense of satisfaction in having learned a skill that would put us in good stead in our future endeavors. 

    While recently clearing out some items we had in storage, we found that several packages of these dehydrated fruits had unintentionally been stored away.  What a great opportunity to have a little homesteading test of our food preservation.  We had followed the general rule of thumb when dehydrating fruits.  They were dried until they had a pliable, leathery texture.  We packaged them in freezer bags with oxygen absorbing packets. 

    First we unpacked the dehydrated mangos

    Condition of packaging: like new.
    Texture: leathery
    Smell: faintly arromatic
    Taste: rather bland with a slight after-taste of mango


    Next came the apples

    Condition of packaging: like new.
    Texture: leathery
    Smell: non-existent
    Taste: very bland with no aftertaste.
    This was easily our most successful carry-over along with our tea-mix that consisted of apple bits, apple and orange peels.


    Condition of packaging: like new.
    Texture: leathery with very dry orange peels
    Smell: slightly fragrant smelling of orange
    Taste: very faint orange flavor.


    Next followed the three least successful:

    Pineapples which tasted mildly unpleasant and were followed by
    Strawberry which along with the below pictured banana slices were inedible, somewhere between burnt coffee and the actual flavor of the fruit.
    The positives:  we learned that the oxygen absorbing packets work very well creating an almost vacuum-sealed packet.

    The negatives:  Taste...  While I believe the quality of the fruits remained and they were not spoiled in any way, the flavor of the fruits did not hold up over the span of time they were in storage. 


    Lesson learned:  Properly dating the food storage bags is very important.  While our home-dehydrated fruits were very tasty when first dehydrated along with those we kept with us and consumed within the first 6 months to a year, those that had ended up in storage for more than a year were a bit more disappointing.  Overall, this worked wonderfully for short-term storage and is yet another great way of preserving the fruit and vegetable harvest from year to year.

    Have you had similar experiences?  If so, I'd love to hear about them.


    this post may have been shared at one (or all) of these wonderful blog hops!

    Oct 27, 2014

    Let's Get Snackin' with Homemade Roasted Pumpkin Seeds


    Both Mr. Newbie and I LOVE savory snacks and roasted seeds and nuts are right at the top of our list.  So with that in mind, I thought I'd share how we made our very own roasted pumpkin seeds. 

    What you'll need:
    A pumpkin (we used a pie pumpkin)
    Serrated knife or hand saw
    Ice Cream scoop or sturdy spoon
    Bowl
    Colander/Strainer
    Baking sheet
    Salt (we like sea salt)

    Here's what we did:

    Step 1
    Cut the pumpkin in half using the serrated knife

    Step 2
    Scoop out the seeds (save the pumpkin meat to can or make pumpkin pie filling, soup or other yummy things)

    Step 3
    Put the seeds in the colander/strainer and rinse under cool running water until clean.

    Step 4
    Spread out on backing sheet and blot with paper towel or napkin

    Step 5
    Sprinkle seeds with a layer of salt

    Step 6
    Preheat the oven to 250F and place the seeds in the oven to bake/roast

    Step 7
    Roast until the seeds are dry and achieve the desired brownness

    Step 8
    Remove from the oven and place on paper towels to cool.  Salt to taste

    There you have it, wonderful, tasty, scrumpdiddly-iscous roasted pumpkin seeds.  No worries about preservatives or other nasties and no hassles.

    Featured on Strangers & Pilgrim's Link Up Love


    this post may have been shared at one (or all) of these wonderful blog hops!

    Oct 20, 2014

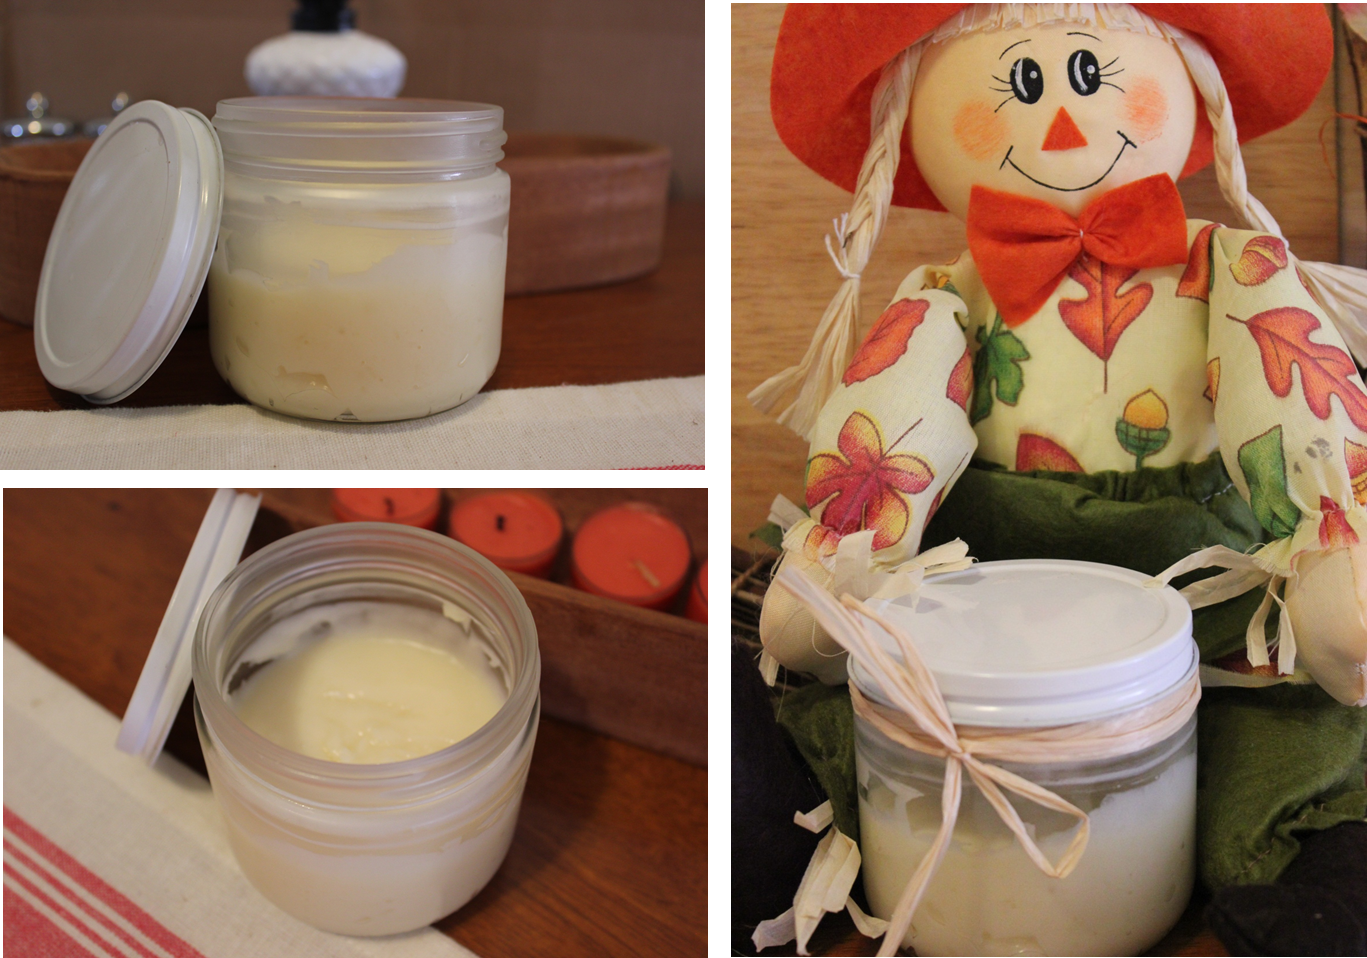
    Homestead Crafting: All-Natural Moisturizing Face Cream


    As the season turns to the cooler months and the bite in the wind is nipping at my skin, my face finds itself in need of a little TLC. I'm not much of a primper on my best day and spending a lot on facial creams that are loaded with chemicals and preservative is not my idea of a good time, so what's a wind-chapped girl to do? Make her own all natural, 100% edible (chemical and preservative-free) facial cream, of course!


    What you'll need:
    1/2 cup of all natural oil (almond, olive, grape seed, jojoba, etc.)
    find a list of carrier oil properties here
    1/4 cup of coconut oil or Shea butter
    1/4 cup of beeswax
    Saucepan/boiler
    Canning jar & several rims or other high temperature safe bowl
    Small jar for the finished product (I reused a honey jar)

    Optional items:
    1 tsp vitamin E oil; Essential Oils or Extracts; Honey


    What I chose:
    3 TBS Almond Oil; 3 TBS Grape Seed Oil & 2 TBS Jojoba Oil to equal 1/2 cup of natural oils
    1/4 cup of coconut oil
    1 tsp Vitamin E oil
    1 tsp honey
    a little less than 1/4 cup of beeswax
    I added the following essential oils: Rosemary (10 drops); Tea Tree (5 drops) and - not pictured - Lavender (15 drops)


    Step 1:
    Gather your materials

    Step 2:
    Measure and place all ingredients except the essential oils into the canning jar or bowl

    Step 3:
    Fill saucepan/boiler with a little water. Place canning rims in bottom or pan and place the canning jar or bowl on top of the rims.  The rims keep the bowl off of the bottom of the pan.  The water level should come about 2/3 up the side of the bowl or jar but not to the top.

    Step 4:
    Melt the contents of the jar/bowl until the wax is smoothly incorporated, stirring occasionally.  Do not boil!

    Step 5:
    Remove from pan and add the essential oils

    Step 6:
    Pour into a bowl (I used my KitchenAid bowl but any bowl that you can mix in will do) and place in the freezer to firm up a bit - do not freeze

    Step 7:
    Remove from freezer and mix with a stand or hand mixer until smooth and creamy and the consistency of cake batter.  Test the "feel" on the back of your hand.  If you prefer, add a little corn starch to cut down on any greasy/oily feeling and whip a minute or two more.

    Step 8:
    Spoon the cream into your storage jar, wipe any spills with a napkin and close.  Store on your counter top or if you prefer in your refrigerator.  The cool cream can help with puffiness.


    That's it!  You have all natural - so good for you - facial cream which can be used for up to 6 months.
    If the cream starts smelling odd discard it and make another batch.


    this post may have been shared at one (or all) of these wonderful blog hops!

    Oct 13, 2014

    Pumpkins, Pumpkins Everywhere - Let's make pie!

    Last week I shared how to can pumpkin with you and one of my favorite things to make with those canned chunks of pumpkin is pie.  Warm and spicy it just defines Fall and the holiday season for me, so I thought I'd share my pie recipe with you today.


    Pie Making Essentials
    • Pie crust (you can use a store-bought crust but here's my homemade version if you'd like the full-on pie making experience)
    • Pumpkin Pie Filling
    • Pie dish (I like the deep dish type)
    • Mixer - electric or wand type - or potato masher and a spoon

    For the pie crust you'll need:
    • 2 cups all-purpose flour, spooned and leveled (sifted)
    • 1 tsp salt
    • 2/3 cups butter or shortening
    • 5 - 7 tbsp cold water

    Instructions:
    • Put flour into a mixing bowl
    • Cube or slice the butter/shortening into the flour
    • Using a fork or pastry cutter, cut the butter into the flour
    • Add salt and water
    • Mix until the dough is formed
    • Roll out on a flat, floured surface or between two sheets of waxed paper (should yield 2 - 9" pie crusts/shells

    For the pie filling you'll need:

    • Pumpkin puree - use canned or steamed pumpkin cubes and puree with a hand mixer until smooth
    • 3/4 cup sugar
    • 1 tsp ground cinnamon
    • 1/2 tsp salt
    • 1/2 tsp ground ginger
    • 1/2 tsp ground cloves
    • 2 large eggs
    • 1 can evaporated milk (12 fl. oz.)
    • 1 UNBAKED 9-inch deep dish pie shell

    Instructions:
    • Mix sugar, cinnamon, ginger and cloves in a small bowl.  Beat eggs in a large bowl.  Stir in pumpkin and sugar-spice mixture.  Gradually stir in the evaporated milk.
    • Place unbaked pie crust/shell into 9" deep dish pie pan
    • Pour mixture into pie crust/shell
    • Bake in preheated 425F oven for 15 minutes, reduce temperature to 350F and bake for 40 to 50 minutes or until a knife inserted near center comes out clean.  Cool on a wire rack for 2 hours.  Serve immediately or refrigerate.  Top with whipped cream before serving.


    For decorative pie toppers:
    using the second pie crust, cut out shapes using a small pie cutter or cookie cutter or use a knife to form free-hand pieces.  Bake at 375F in a preheated oven until desired brownness.  Remove from oven and cool completely.  Place on pie when removed from oven - prior to cooling.

    
    featured by Trayer Wilderness at Simple Life Sunday;
    A Gypsy Herbal's Warm & Cozy Fall Foods Roundup and
    Strangers & Pilgrim's Link Up Love


    this post may have been shared at one (or all) of these wonderful blog hops!

    Oct 6, 2014

    How to can pumpkin


    It's officially Fall now and I'm super excited.  I love everything about Fall, the cool crisp mornings and mild evenings; the explosion of color from the changing trees and most of all the homey smell of baked goods and foods being prepared for storage.  If there's one food that epitomizes the season for me it's the pumpkin.  Pumpkin Pie, Pumpkin Spice Lattes, Pumpkin Soup and mashed pumpkin with butter, brown sugar and cinnamon (think mashed potatoes only yummier!).  With all that pumpkiny goodness awaiting it was next to impossible for me to not want to store some up for the winter.  So off I went on a fact-finding mission to figure out how to can those lovely little bundles of Autumnal joy...  here's what I found.  Canning pumpkin really isn't all that difficult, sure it will take a little more effort and you'll need a pressure canner but otherwise it's pretty straight forward.  Let's get this little disclaimer out of the way first. The USDA recommends you do not home-can pumpkin puree, butter or pie filling; only can pumpkin cubes.  So, now, let's get to it!

    First, what you'll need:

    A pumpkin (of course) but not just any ol' jack-o-lantern pumpkin... you'll need a Pie Pumpkin.  These are a smaller, sweeter and less grainy textured pumpkin which you can either get at your local grocer, farmer's market or if you're lucky to have one near "pumpkin patch".

    You'll also need:
    A microwave, steamer or a baking sheet and oven.  I use a steamer since I don't own a microwave and the oven just takes too long for me.  Choose what works best for you.

    A knife for cubing the pumpkin and preferably a serrated knife for cutting it open before you cook it.
    A clean pot holder or oven mitt for holding the pumpkin while hot
    Canning jars, lids and rims (properly sterilized with new lids)
    Canning tools like the jar grabber/lifter, funnel and and a spatula or wooden spoon handle
    A pressure canner large enough to accommodate the canning jars you've chosen and a timer.

    Now for the fun part....

    Step 1 - Get your pumpkin

    Step 2 - Prepare the pumpkin for cooking: wash the exterior in cool or warm water - do not use soap! Cut the pumpkin in half with the serrated knife (a smooth bladed knife is more likely to slip and injure you) using a sawing motion. If you prefer use a small hand saw to cut through the tough skin.

    Step 3 - Scoop out the seeds - use a melon baller or ice cream scoop to scoop out the seeds and stringy insides. SAVE THE SEEDS for replanting or roasting!

    Step 4 - Cook it!  There are several ways to cook the pumpkin.  As I mentioned above I prefer steaming, but I'll list the methods below so you can choose what works best for you.

    Method 1: Microwave
    Remove the stem and put the pumpkin into a microwavable bowl, cut it into more pieces if the larger ones won't fit but remember that the fewer (and larger) the pieces the easier it will be to remove the skin later.  Put a couple of inches of water into the bowl and cover it.  Microwave in intervals until the pumpkin is tender - but DO NOT MASH or PUREE it.  Be very careful to keep the pumpkin in tact.

    Method 2: Steam on the stove top
    I use a double pot steamer but you can also use an ordinary pot with a steamer basket.  Place the pumpkin pieces into the steamer and steam for 20 - 30 minutes or until tender.  Again, be careful not to mash the pumpkin.  Save the cooking liquid, you'll use it for packing the jars later.

    Method 3:  Baking in the oven
    This method takes the longest.  Place the pumpkin cut side down in a covered oven-safe dish. Bake at 350F (200C) for 45 - 90 minutes or until tender.  Test periodically with a fork.

    Step 5 - Prepare your canner.  Fill the pressure canner with at least 3" of water and bring to a boil.


    Step 6 - Peel the pumpkin - The skin should easily peel off using a blunt knife in one hand and an oven mitt in the other.


    Step 7 - Cut it - Cut the pumpkin flesh into 1-inch cubes (BE CAREFUL NOT TO SMOOSH THEM).

    Step 8 - Pack the jars - fill the canning jars with your pumpkin cubes and fill them with the cooking liquid from steaming (or if you used a different method - boil a pot of water and use that) leaving 1" of headspace.  Place the hot lids and rings on the jars.

    Step 9 - Let's get canning... Take your jar lifter/grabber tongs and place the jars onto the rack of your pressure canner.  If the water level has dropped below 3" add more hot water.  Put the lid on the canner but do not place the weight or close the valve (depending on your type of canner).

    Step 10 - Let it vent.  Put the stove top heat on high and let the canner vent steam for about 10 minutes.  This purges the airspace inside the canner.

    Step 11 - Put the weight on or close the valve to let pressure build.  Pressure should build to 11 to 13 pounds in a dial-type canner gauge or 10 to 15 pounds in a weighted gauge canner.

    Step 12 - Process.  Once you reach the correct pressure, start your timer and process the jars for the required time.  I used 65 minutes for pint jars and 75 minutes for quart jars.  Adjust the heat as necessary to maintain a consistent pressure in the canner.  Also pressure requirements depend on the altitude.  Here is a chart to help you determine the pressure and processing times if you are above sea level.  Canning books or other online canning guides may have more helpful charts so keep that in mind.


    Step 13 - Be Cool - After you've processed the jars for the required time, turn off the heat and let the canner cool down.  After the pressure drops to zero wait 3 additional minutes and then remove the weights or open the valves to allow remaining steam to vent.

    Step 14 - Remove the jars and let them cool. - using the lifter/grabber tongs, remove the jars and place them on a wooden cutting board or towel to cool.  Do not touch or bump them.  After the jars have cooled you should check the lids to make sure they have sealed properly.


    That's it! Now you have yummy, homey pumpkin for the winter.  You can eat them as is, puree them for pie filling or soup or you can mash them up like potatoes. Have fun!

    P.S.  Remember to label your jars! Here are some lovely printable labels from JES at Strangers & Pilgrims on Earth.

    
    featured at Front Porch Friday by Preparedness Mama;
    Strangers & Pilgrim's Link UP Love and
    A Gypsy Herbal's Warm & Cozy Fall Foods Roundup


    this post may have been shared at one (or all) of these wonderful blog hops!

    Sep 29, 2014

    Homestead Crafts: Knitted Doll Pattern

    Since we are creeping on toward the holiday season I decided to share one of my crafted gift ideas with you.  A couple years ago I decided to hand-make the Christmas presents for my little nieces.  I believe that something that's been made with love and thoughtfulness makes a wonderful gift for those we love and is something that can be passed down with time.

    My thoughts ran through my limited skill set and I landed on making knitted dolls for them.  Now, I'm anything but the worlds best knitter so I needed something that a relatively inexperienced knitter could tackle in a short amount of time (I needed to make two after all) and that wouldn't make me pull my hair out before the project was done; I found a great pattern by Vivian Hoxbro at www.viv.dk for her Danish Christmas "Nisse" dolls.  At first I was a bit intimidated by the instructions, but once I figured out how to read them the directions were very simple.

    What I used for this project:
    1 skein Red Heart Super Saver yarn in "Buff"
    remnant of purple and soft pink yarn (for dress)
    remnant of soft pink and purple yarn for scarf, contrast stitching in dress and belt
    remnant of chunky brown yarn for hair
    white sewing thread
    sewing needle
    2 small black buttons with posts (for eyes)
    cotton batting for stuffing
    1 set of size 8 double point needles
    1 crochet hook

    Instead of knitting the Christmas dolls in the original version, I decided to change the coloring so that the dolls would resemble my nieces and would have a dress in each of their favorite colors (pink and purple). Otherwise I followed the directions for the construction of the dolls.  Once the dolls were completed and the dresses had been finished, I made the hair out of chunky brown yarn by inserting a crochet needle through a stitch on the dolls head and out the other side, then I doubled the yarn and hooked it before pulling it back through the stitch.  I made sure to hold one end of the yarn firmly so that only the other end would be pulled through.  Once that was done I simply knotted the yarn on the head and proceeded from there until the head was covered to my liking.

    I also did not knit the shoes in a contrasting color opting instead to leave the entire leg and feet in buff.

    I hope you enjoy this pattern as much as I did, I can see endless possibilities for this, possibly a teddy bear or something similar in the future.  Just knit some ears and sew them on the head instead of the hair.


    this post may have been shared at one (or all) of these wonderful blog hops!

    Sep 22, 2014

    A note from the 'stead:


    We'll be back at our regular time next week, hope to see you then!

    Sep 15, 2014

    Preserving the harvest when you don't have a garden or orchard


    How do you stock your pantry for the dark winter months ahead if, like us, you aren't living full-time on your homestead or you don't have the space or option to garden where you are?

    Our solution?  "Pick Your Own" farms.  We are fortunate enough to have several orchards near us that offer very reasonable rates for gleaning your own fruits.  We try to take advantage of these as often as we are able.  We've mostly had success in getting loads and loads of apples and pumpkin but ours also offer pears, peaches, strawberries and cherries in season.

    
    How does it work? If you aren't familiar with these, the concept is very simple.  You check the Pick-Your-Own website here to see if there are any in your area; then grab your family and as many friends as would like to tag along before heading to the closest farm or orchard.   Once there, you generally will be directed to the farm store or produce stand where you will be able to chose the amount you'd like to pick (for example: 25lbs is our standard but we could choose to get multiple 25lb bags and fill those if we wanted to.)  Once you make your selection you pay up and head out into the orchard.  The experience will vary depending on how large the operation is.  We have a mix of farms near us so some of them are relatively small and offer only a few varieties but others have a wide range available and require a drive-through in order to access the portions you want to pick from.  A map depicting the farm's layout and their varieties is generally available where you pay, make sure to grab one!  And that's about it, you get your bags and stuff them as full as you possibly can, put them in your car and head on home.  We've canned apple wedges, apple pie filling and apple sauce; not to mention dehydrating apple slices for snacking as well as drying the peels to use in tea.  We've also picked our own pie pumpkins from the pumpkin patch and made pie filling as well as canned pumpkin chunks.
    a small part of our pick-your-own apple bounty
    Having no option for gardening right now, we are very thankful to be able to do this.  If you have the opportunity to check one out for yourself I'd encourage you to go for it.  It's a great way to spend the day with your loved ones and do a little bit for your self-reliance and preparedness.

    this post may have been shared at one (or all) of these wonderful blog hops!

    Sep 8, 2014

    Free Homesteading Information - where to find it and how to get it.


    If there's one lesson that I've learned since we started on our homesteading venture, it's that setting up a 'stead doesn't come cheap.  While we focus on reusing and re-purposing items as well as searching for inexpensive alternatives, one area we've found can cause considerable cost is amassing a resource library.  Research and information is vital to us as neither myself nor Mr. Newbie come from agricultural backgrounds and as anyone who's gone looking for information at places like Amazon or Barnes & Nobel knows those books aren't inexpensive.  Local libraries and online sites can be a wealth of useful and much appreciated information but sometimes you just want to know where to go without looking through pages and pages of search results (or at least I do)... 

    Well, look no further!  I stumbled across a wonderful resource for free farm and homesteading information and want to share it with you:  USDA Farm Bulletins!  Now I realize that these are older publications but the information in them is still very relevant to today's aspiring 'steader community.  You can find these to buy in paper form on eBay and other places but my favorite is a free online option for reading them via the digital library at the University of North Texas.  I'm in the process of saving links to those that are most interesting to us in our Library section as I discover them.  The University lists over 1800 results in the Farm Bulletin Serial so go ahead and check them out, I'm sure you'll find something that will be helpful to you, I sure did. 

    If you'd like a bit more hands-on and personal experience you can do as my southern granny does and visit or call up your local county agent or county extension office.  These folks are a storehouse of knowledge for the home gardener and homesteader alike.  If (like me) you have no idea how to locate your extension officer you can do so by searching you're state on the "Pick Your Own" website here.
    I've already found some very interesting and useful information on our specific locality via my local extension office's website (which is found with the office's contact details at the link above) and I'm sure we will be making even more extensive use of these guys once we make the full-time move to our property and start building up our homestead.

    I'd love to hear your ideas and resources as well, feel free to leave them in the comments section below.


    this post may have been shared at one (or all) of these wonderful blog hops!

    Sep 1, 2014

    Super Simple, Quick and Easy Homestead Apple Cobbler


    This summer has been unusually mild over most of the U.S. and it's no different in our neck of the woods.  With the cool evenings and crisp mornings my mind has turned toward fall.  Its these blustery pooh-type days that put me in the mood for the gooey, warm comfort of apple cobbler so I thought I'd share our super simple, quick and easy Homestead Apple Cobbler recipe with you and spread the autumn love.

    What you'll need
    Filling:
    Our canned apple pie filling (or a store bought filling if you choose)

    Cobbler batter (printable card with our pumpkin cobbler recipe here):
    1/4 cup butter - cubed
    1 cup sugar
    3/4 cup flour
    1 tsp baking powder
    1/2 cup milk
    1/2 tsp salt

    Instructions
    Preheat the oven to 400F
    Mix the dry ingredients
    Work the butter into the flour mixture with a fork until crumbly
    Incorporate the milk and beat until smooth
    Pour or spoon batter into a deep baking dish (I like to use a 9" Pyrex(TM) deep-dish pie pan)
    Pour or spoon the filling onto the batter (do not mix in) the batter will rise up through and around the filling.
    Bake at 400 for 45 - 55 minutes or until golden brown and bubbly.  Start watching it after about 35 minutes as it can go from brown to burnt rather quickly.
    Best served warm with vanilla ice cream or a vanilla sauce on top.

    We hope you enjoy this little taste of autumn!


    this post may have been shared at one (or all) of these wonderful blog hops!

    featured by Strangers & Pilgrims