
My second project is complete and I have to say the fact that I've made this dress before has helped me to be able to concentrate more on finishing details. The challenges and successes of this dress were:
Challenge 1: the princess seams
In the first version of this dress the princess seams gave me a little trouble because they wanted to bunch and pucker. I'd never sewn anything major before and princess seams were in a new league. The seersucker fabric on the first version helped to disguise the puckering a bit though so I wasn't all that unhappy about it. I sewed this dress out of basic cotton and any puckering would be very visible (the unfortunate placement would be a bit embarrassing) so I wanted to concentrate on getting that seam as smooth as possible. I managed it a bit better but it still isn't quite perfect.
Challenge 2: the sweetheart neckline
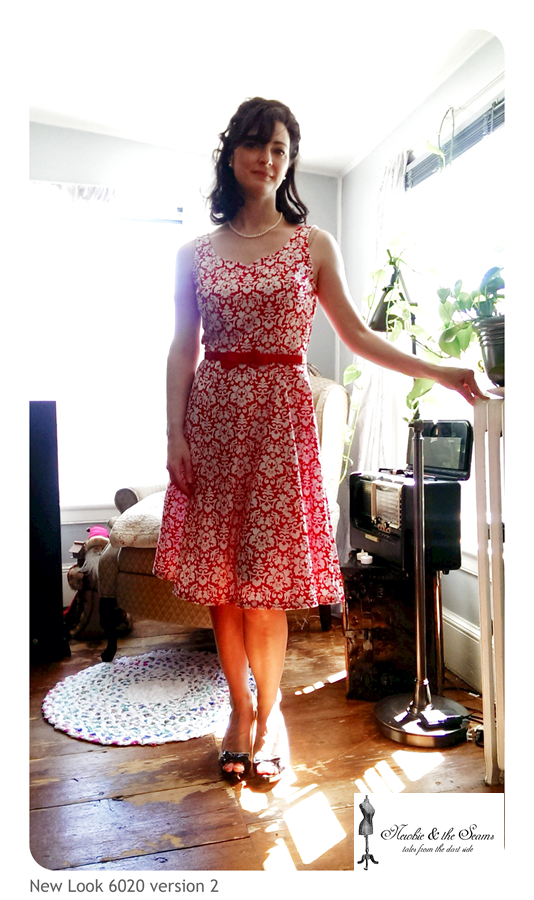
 The neckline on this version is very feminine and pretty. the slight heart-shaped curving makes it so much more special in my opinion. That same curving presented a sewing challenge to this newbie but I believe I managed to achieve it without too much distortion and puckering. A note to any other newbies trying this dress, make sure you transfer the stitch line from the pattern to your fabric very carefully. The curvature toward the "v" is super important to making this look perfect.
Successes: I managed to make the neckline and princess seams at the bust relatively smooth and with the addition of an overedge foot I was able to finish off my seams beautifully. My major success, however, was the side zipper. It looked so much better on this dress and went in very easily. After trolling some other sewing blogs and doing some searching online, I ignored the instructions in the pattern and just did the following:
Installing the conventional zipper (my way):


Iron the seam allowance open

-
make sure the zipper is closed and the pull is pointing up toward the armscye and neckline. (The zipper pull doesn't show on the picture - sorry)
Pin
 with a zipper foot stitch along the edge of the zipper teeth from the neckline downward (you'll need to sort of feel the back of zipper tape to find the right spot). This is a little finicky but its also where the pull being up comes in... You'll need to move the zipper pull down about 2 inches before beginning. Then, once you've almost reached the pull with the zipper foot, make sure your needle is down, raise the foot and work the zipper pull back up until it's cleared the zipper foot. Continue stitching close to the teeth until you reach the the zipper stop. Stitch past the stop one or two stitches and leave your needle down in the last stitch. Lift your presser foot and pivot the dress so that you will be sewing across the bottom of the zipper. Lower the presser foot and stitch once before backstitching and then continue across the bottom. On the other side backstitch ending with the needle down again, then pivot and sew along the zipper toward the top remembering to work the zipper pull down to clear the foot again before completing that side. In a side seam like this I chose to sew past the top stop and across the zipper as I did at the bottom. Remember to back stitch at the beginning and end.
-
carefully remove the basting stitches with a seam/stitch ripper. Try your zipper to make sure it works. And that's it!
I know it sounds like a lot of work but it's really the simplest I could figure out. Anyone out there have any other nifty tricks for zippers? I'd love to hear them!
this post may have been shared at one (or all) of these wonderful blog hops!
It turned out beautifully! This brings back some anxious memories from long ago. I took home ec (home economics) in the 9th grade. This was more than 40 years ago. On of our projects was to sew an article of clothing. My mother had always been an excellent seamstress and I thought it looked so easy. I picked a pattern with princess seams. What a mistake! Making that dress was one of the most difficult things I've ever done! Therefore, I applaud you for tackling this job and being successful! Keep up the good work with your blog!
ReplyDeleteThank you so much for your encouraging comment and for stopping by to visit! I'm enjoying this dressmaking adventure I'm on right now. I hope you have a wonderful week and stop by again soon.
DeleteWow, your sewing is really coming along. Good for you pushing yourself to try new methods. I learned to sew years ago in school strictly by the book, but I say whatever works best is good. The seams look fine to me. Have a great week
ReplyDeleteThanks again Magnoliasntea! I always look forward to your visits. Have a great week as well.
DeleteHow beautiful!
ReplyDeleteYou look like Jackie O.! Such a classy dress!! Good job :) Thank you for sharing this on the Art of Home-Making Mondays! Please join in again next week...
ReplyDeleteThank you so much JES!
Delete